
Online Tutorial.
The Radio Shack WX200
Perhaps the simplest and most inexpensive weather station is the WX200 which is sold by Radio Shack. It is identical to the unit sold by Oregon Scientific, the original manufacturer. And it's available at the mall ...
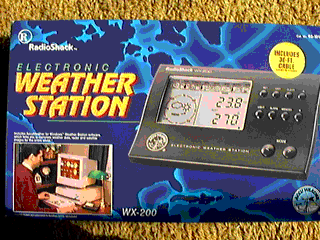
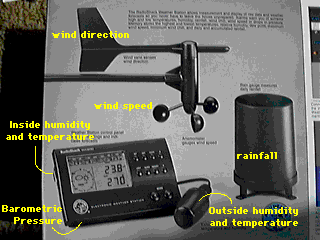
The cost of the WX200 is about $300 US, and includes all of the sensors, wires,
and connection boxes. And the instructions for setup and calibration are very
simple. I had mine completely set up in less than an hour. Minus the time it took to decide where to put it, and the time it took me to figure out what serial cable to use...
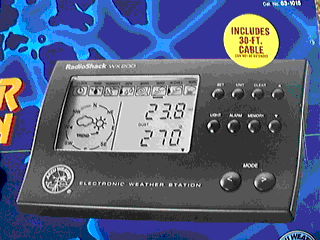
Out of the box you get the manual 'console', with LCD display, always showing the current wind direction, barometric trend, forecast, and one selected measurement.
It even includes some very nice software for retrieving (and even sending) local weather data from the Internet.
Unfortunately, the software is only for wintel machines, and there is no software available for the Macintosh.
Not to worry, if you've got a spare old MacPlus around, it can be the host of a simple little Applescript applet which can read, and send changes to XTension which is running on another Mac. ( at the time of this writing, there is a problem running the applet on the same Mac as the host for XTension....to be fixed)
This applet (wxread), is included in the plug-in for this tutorial.
How the Mac talks to the WX200
Unlike the Davis weather station, the WX200 doesn't require an add-in serial port interface. The cable you need between the Mac and the WX200 is the only thing you will have to buy or make.
What does the WX200 report to the Mac ?
According to the manual, some weather sensors are sampled more frequently than others. Wind speed and direction, gusts etc, are more frequently sampled than for example humidity or barometric pressure.
These packets of data come in to the Mac via the serial port, at a rate of about
once per minute.
This data is received by the weather applet, and there it is processed into 'significant changes' which it then sends to XTension as changes to units in your database.
Scripts can be associated with changes in these values, and you can have periodic or on-demand scripts which announce changes or current weather.
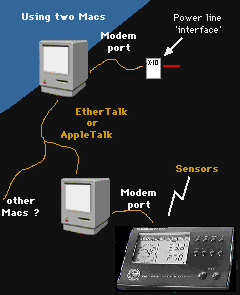
For now, you will need two Macs set up like this :
With XTension running on one Mac,
And the wxread applet
on another ...
|
|
 Making it simple:
This tutorial includes a 'plug-in'. This file actually includes several files which are necessary for this to all work. All scripts are already written, but you may have to make some changes. You will of course have to 'un-stuff' them first.
>>
Here's where you download the plug-in. <<
 Here's what is in the 'plug-in' :
 wxread
This is an AppleScript applet which periodically samples the WX200 weather data. It runs separate from XTension, and determines whether any data have changed significantly. If so, it sends a message to XTension to put the new value into the XTension database.
 WX200.base plugin
This file is an XTension 'plug-in', which you must 'import' into your XTension system. It includes new units with names corresponding to the weather values that come from the WX200.
 CTB.paul serial port OSAX
This is a AppleScript Addition, or OSAX and is used by the applet to read from the serial port. It is believed that this may be the source of the problem of running the wxread and XTension on the same Mac. It should be put into the Scripting Additions folder in your System Folder:Extensions.
 AutoGuest Init
This is an osax that allows the wxread applet to connect to the XTension host and send changes without having the annoying "Sign On" dialog appear. It needs to be put into both the XTension host and the Mac running the wxread applet.
Let's get started :
 First, we need to take it all out of the box, and take some time reading the manual about the setup of the sensors and the degree of freedom that you have with the location.
 There is a cable that must go between the Mac and the WX200, the length of which will vary according to where you get it.
 Another which goes between the WX200 and a "Junction" box where the cables from the sensors all come together. This cable is about 10 feet long.
 Each of the sensor modules connect to the junction box through cables of their own, and are of various lengths.

 Your biggest problem will of course be just how to mount the sensors within range of their cables to the junction box, and thence to the WX200.
It is not known how far each of these sensor cables can be extended by substituting longer ones, but it should be reasonably easy to determine ad hoc
Setting up the Sensors
 You should be aware that Sand Hill is a very poor company and it will not be productive for you to sue us for injury you suffer because we told you to climb on your house to install these....
But, as the manual implies, they need to be placed where they can detect the weather data in the most un-impeded way.
For example, the wind direction and speed are affected by the pitch of your roof, as well as surrounding trees. You may want to set up a mast in your yard which is away from trees or buildings.
( I find that I am most interested in changes rather than absolute values, and wind which is really strong, is always noticed, as well as its direction even in the installation below : )
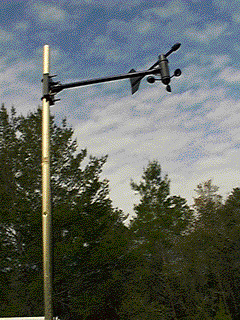
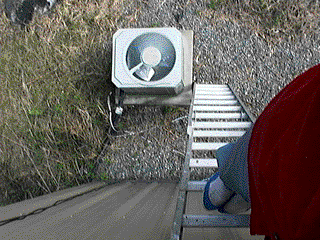
The mast is about 4 feet tall,
about 18 feet above the ground,
on a low pitched roof :
Note the surrounding trees,
which are 40-60' tall and
definitely suppress wind
from the North...
|
|
|
Just DON'T
Look Down !
|
You need to make or buy a serial cable :
 This cable is described on another page to limit 'geekiness' here...
Now set up the Mac and XTension :
 You download the 'plug-in', and import it into your XTension system.
You can put the wxread applet on the desktop of the Mac.
 Next you must connect the serial cable from the station to the Mac Modem port. If you need to use the Printer port, you will have to use the AppleScript Editor to change the applet. (comments are in the script)
 Make sure that you have the osaxen "CTB.paul" and "AutoGuest Init" in the Scripting Additions folder. ( System Folder:Extensions: )
 Import the wx200.base plugin into XTension.
 Double-click on the wxread applet.
 You should see something like the following on the Mac running XTension :
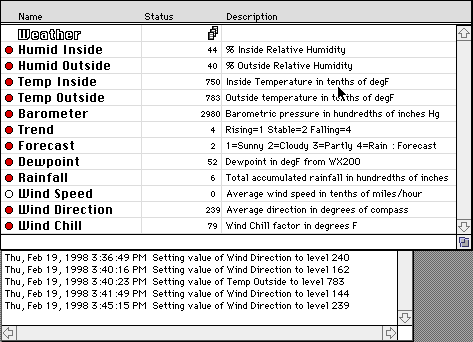
 In an operational system, on startup of XTension, the Startup Script could indeed make sure that the wxread applet is running on the weather Mac, or when we get the problem fixed with the serial osax, it should auto-start the applet with each startup of XTension.
How do you use this data ?
 The values sent by the applet to XTension are in a form which can easily be used by all of your scripts. All values are returned in integer form, and thus any decimal point is assumed.
In the example above, Inside Temp = 750 really means 75.0 degF,
and the Barometer = 2980 should be 29.80 inches of mercury.
Whenever you want to display these values, you should remember to 'scale' them accordingly, such as for the Barometer :
write log " The current outside pressure is : " & value of "Barometer"
result = "The current outside pressure is 2980"
OR:
speak "It's " & ((value of "Outside Temp")/10) & "outside"
So why don't you say more about the applet ?
Enough said that the data from the WX200 is sputilated into a format which is not easy to describe without making this whole home automation thing look geeky. It took a long time to figure this out, with a lot of help from other websites and discussion list members.
If however you are interested in the applet, you need only call it up with the Script Editor, and perhaps review the comments about the Davis
applet...
So now I have it what are some cool things I can do ?
Like : I'm about to rush out of the house, and I simply press a button which tells me according to 'my' preferences, whether I MUST grab a coat, a sweater, or galoshes...
You might even have your system signal your Beemer convertible to automatically unlock the doors and put the top down... !
As always, this tutorial should be considered to be 'in-work', and any suggestions or corrections are encouraged...
Copyright 2007, Sand Hill Engineering Inc. All rights reserved.

Last modified: February 19, 2007
Michael Ferguson, webmaster@shed.com


![]()